
Autoblock Self-Belay
 Sonny Lawrence
 This is a discussion concerning the use of self-belay while on rappel with an autoblock.
It should be noted that all self-belays have some trade off of one sort or another. None are perfect. All must be used with caution. No belay of any sort should be used while rappelling in a significant amount of moving water. In this situation the forces on the body can be huge, resulting in a catastrophe, that is; death. An autoblock self-belay is a particular style of self-belay wherein the belay device is below the rappel device. By having it in this position, it mitigates some of the disadvantages of having the belay device above the rappel device.

The nomenclature for rope grab hitches can be confusing. The word “prusik” can be a verb as well as a noun. Similarly, the term “autoblock” has come to mean a friction hitch tied below the rappel device that can stop the descent. Often it is referred to as a “French Prusik,” which can also be used to describe an entirely different hitch. Or it may be referred to as a “third hand.” For this discussion, the generic meaning for autoblock will be used. There may be a variety of materials and hitches used to create the autoblock. This discussion covers just one of these possibilities.
The material for the autoblock normally is nylon cord; 6 mm diameter will suffice. It must be supple enough such that it easily grabs the rappel rope. Larger diameters may work. Pick a cord that can be used on the usual range of rappel ropes: 9 mm to 12.5 mm. Ultimately the proof is in the testing. Certainly, it is possible to cannibalize surrounding gear and build an autoblock. Cord or webbing may work. But it is far wiser to create one at home and test it before it is needed. Be careful if using other than nylon cord. Spectra (similarly Dyneema) has a low melting point. Not good for this use! Commercially sewn Technora cords have a high melting point and are acceptable (if not the best) for an autoblock. However, Technora weakens due to flexing over time. It needs a nylon or polyester core. Get in the habit of inspecting the cord for excessive wear. Make sure the knots have enough tail and are secure. If it is not safe to use, throw it away.
 Obtain enough cord to build loops between 10 and 18 inches long. The length depends on the rappeller’s body size, harness type and method of attachment. Experimentation and fine tuning are needed here. Tie a closed cord loop (a.k.a. “prusik”) with a double overhand bend (double Fisherman’s, Grapevine). Bounce on it with full weight to set the knot.
Attach the cord loop to the rappel rope by simply wrapping it around. It is possible to have too few or too many wraps. Experiment. Clip both ends of the loop to a carabiner. This carabiner may be connected to either the main harness attachment point or a leg loop. Depending on the design of the leg loops on the harness, the carabiner may need to be clipped on the inside of the leg in order to prevent loosening of the leg buckle. Each type of attachment has tradeoffs. The self-belay will fail if not done properly.
Operating the autoblock takes a little practice. There are two options for hand placement. Both hands can be used by placing one above the autoblock to tend it while the other hand is the brake for rappel. Alternatively, the brake hand can do double duty, also tending the autoblock. This leaves the other hand free for various tasks.
Now for the critical lifesaving test: check to see if it functions properly. In a safe location, weight the rappel rope. Let go of the autoblock, allowing it to catch. Turn to the side opposite of the autoblock. For example, if the autoblock is attached to the right leg loop, contort the body to the left. The purpose is to determine if in 
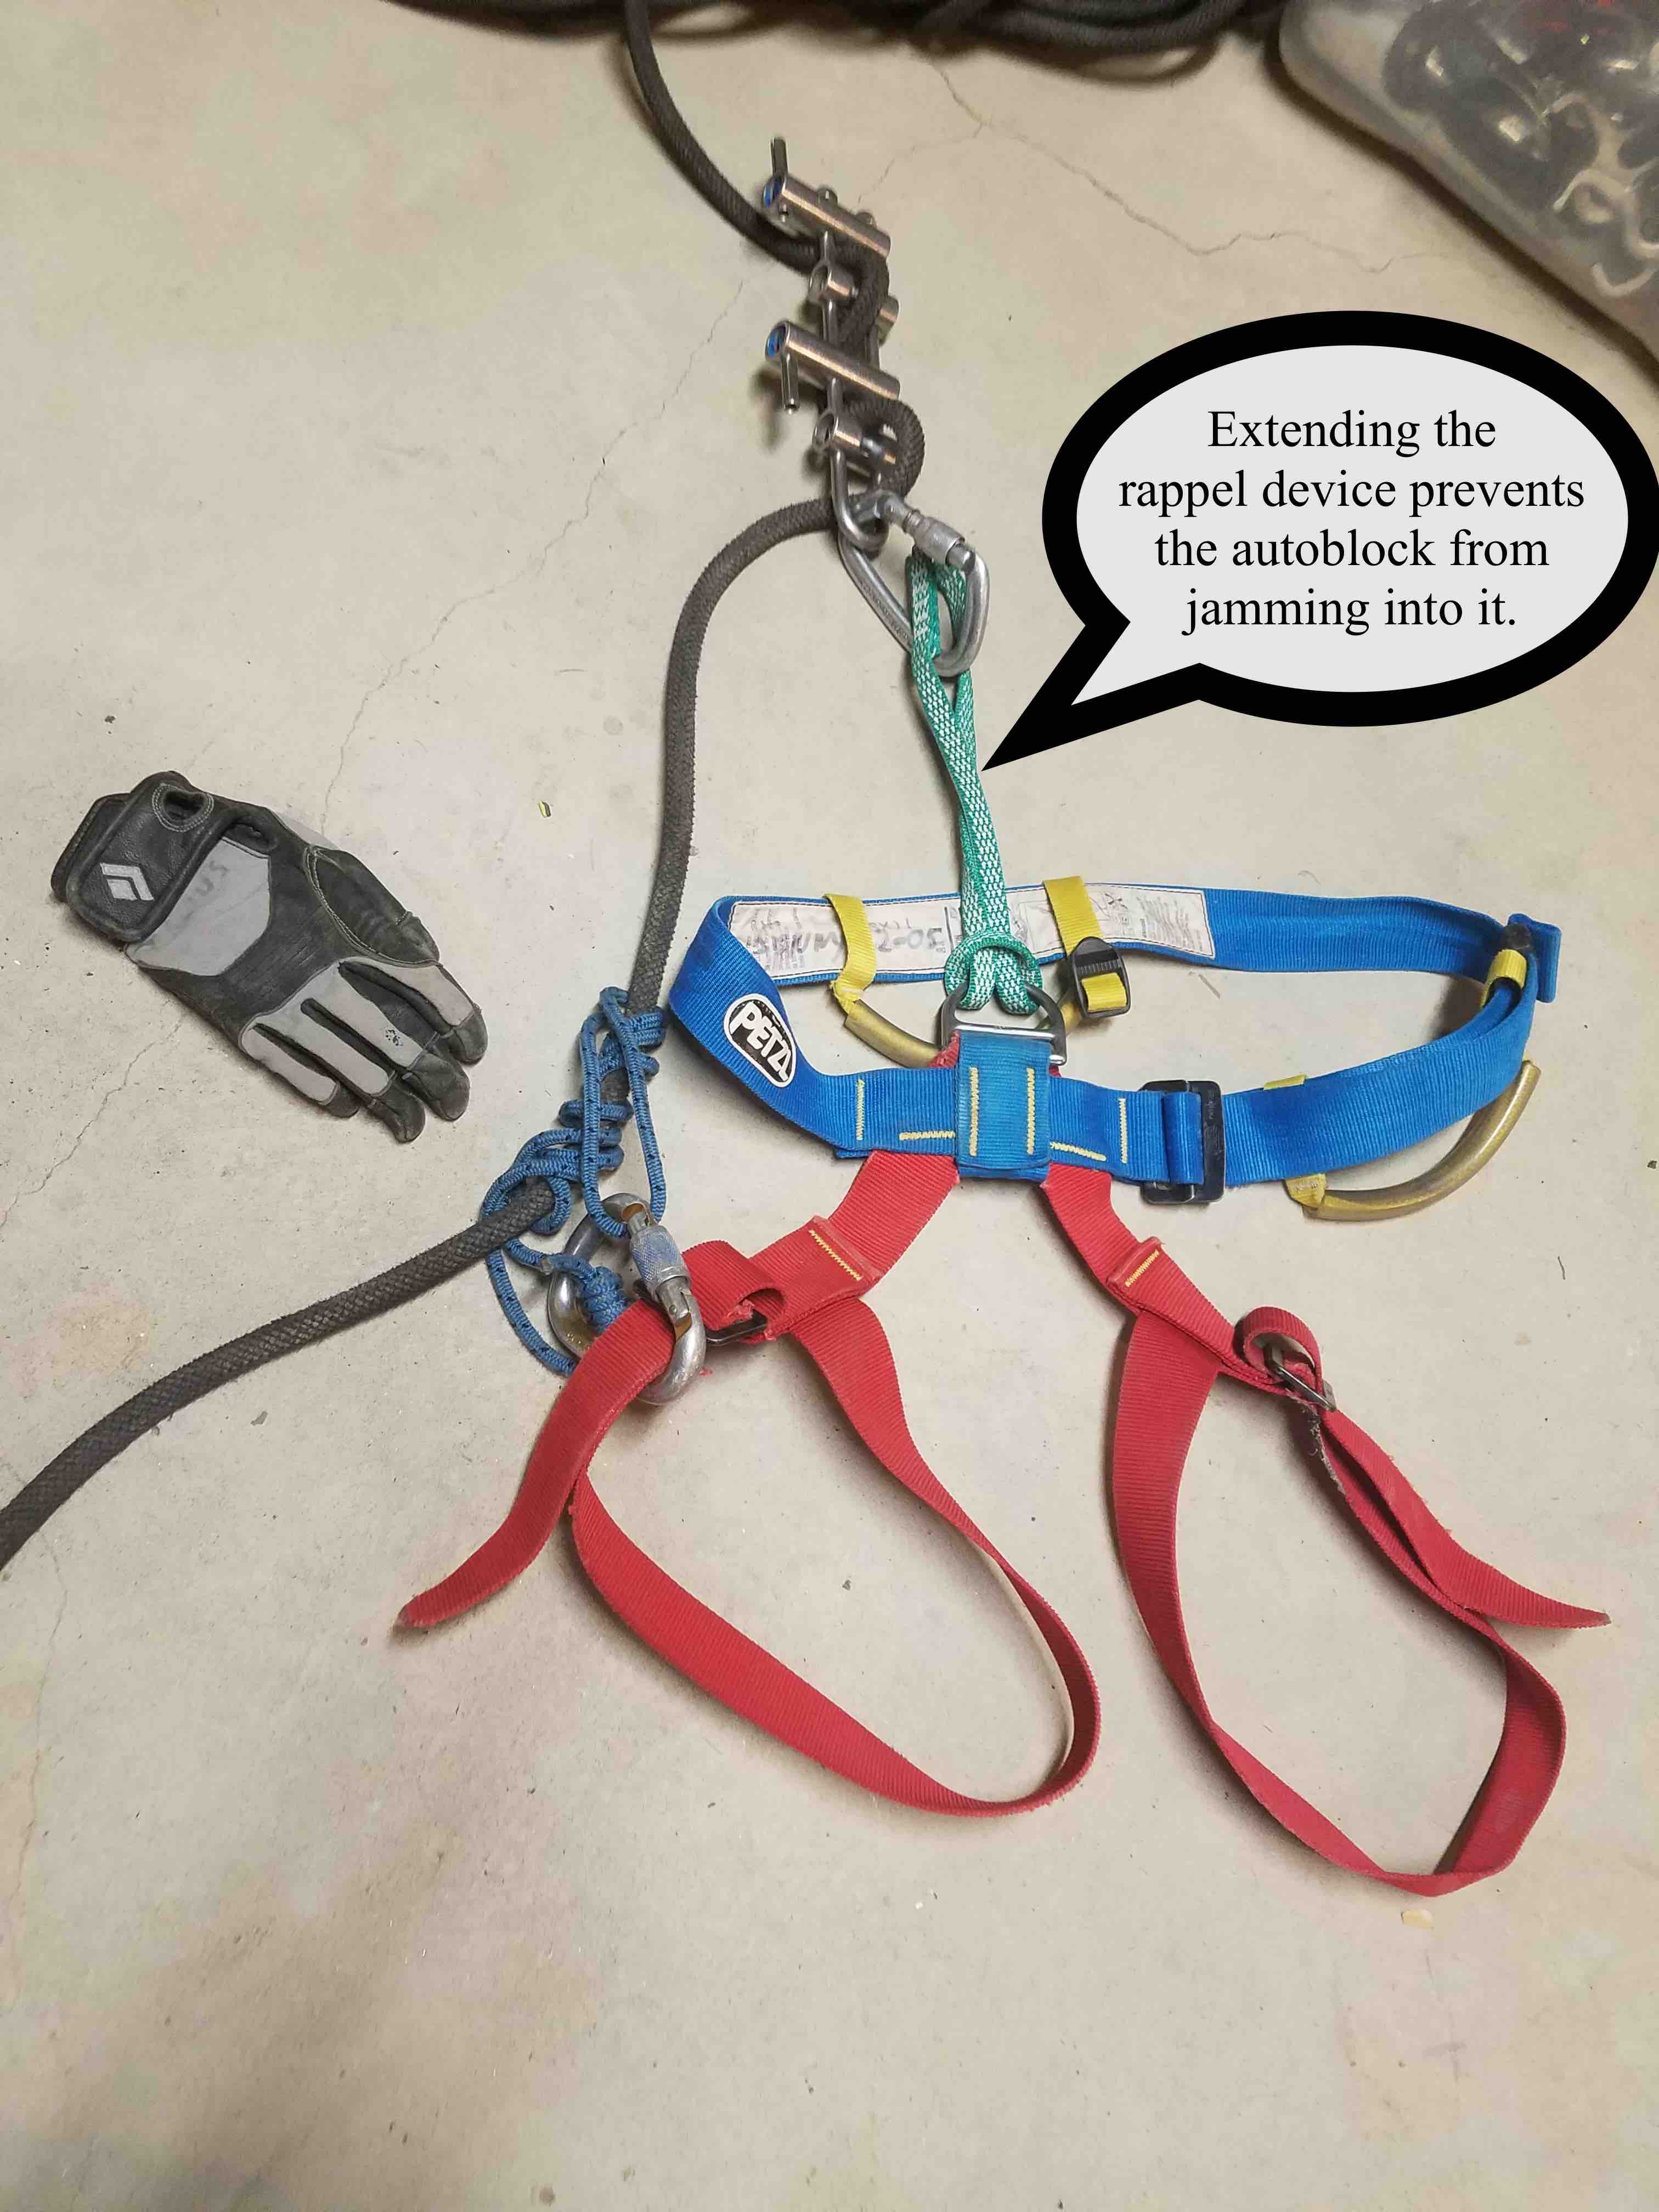
the worst scenario will the autoblock lock off, stopping the rappel. If the autoblock is too close to the rappel device, it jams up against it and will not function. A full test may require a free rappel wherein the leg gets raised toward the rappel device, allowing the autoblock to jam up. If this occurs, the loop may need to be shortened. Alternatively, the rappel device may need to be extended. In any case, the autoblock must never be allowed to touch the rappel device; no matter what the body position may be.
Please, please, please practice, practice, practice in a safe environment before an autoblock is actually needed.
I don’t recall if, in this write up, I stressed how important it is to test this system and work out the bugs before it is used in the real world. Guess I better re-read this a few times to be sure.


News
Reader Comments